
I think everyone has wished that bows, hats, etc. on nuiMOs were removable, but still allow you to use them. Putting one bow in front of another is obnoxious. This modification can help your dreams come true! If you are reluctant, the process is reversible!
While this tutorial is free, it is not to be sold. This is takes a lot of time to come up with, execute, and post.
Please give credit to @kawaii.nuimos on Instagram and refer people to this blog for the tutorial.
Materials:
- Two 3mm x 1mm magnets. These can be found on Amazon in large quantities. You can get (at the time of typing this) 300 for just under $10USD. You are probably thinking “but I just need two!”, but I assure you that you will get addicted to using these on light props and such.
- Tacky Glue. I chose this glue to help reluctant ones feel more confident in the choice to modify their nuiMOs. This glue is water-soluable. If you would like a more permanent and stronger bond, E6000 glue is recommended.
- Fabric the color of the nuiMO’s head. I used black fleece to have that fuzzy texture. Felt is an option. Even cotton will work! The thinner the fabric, the more hold the magnets will have. You need a VERY small amount.
-Thread or embroidery floss that matches the nuiMO’s head/fabric.
Tools:
- Sewing needle
- Scissors
- Seam Ripper (optional, but helpful)
Step 1:
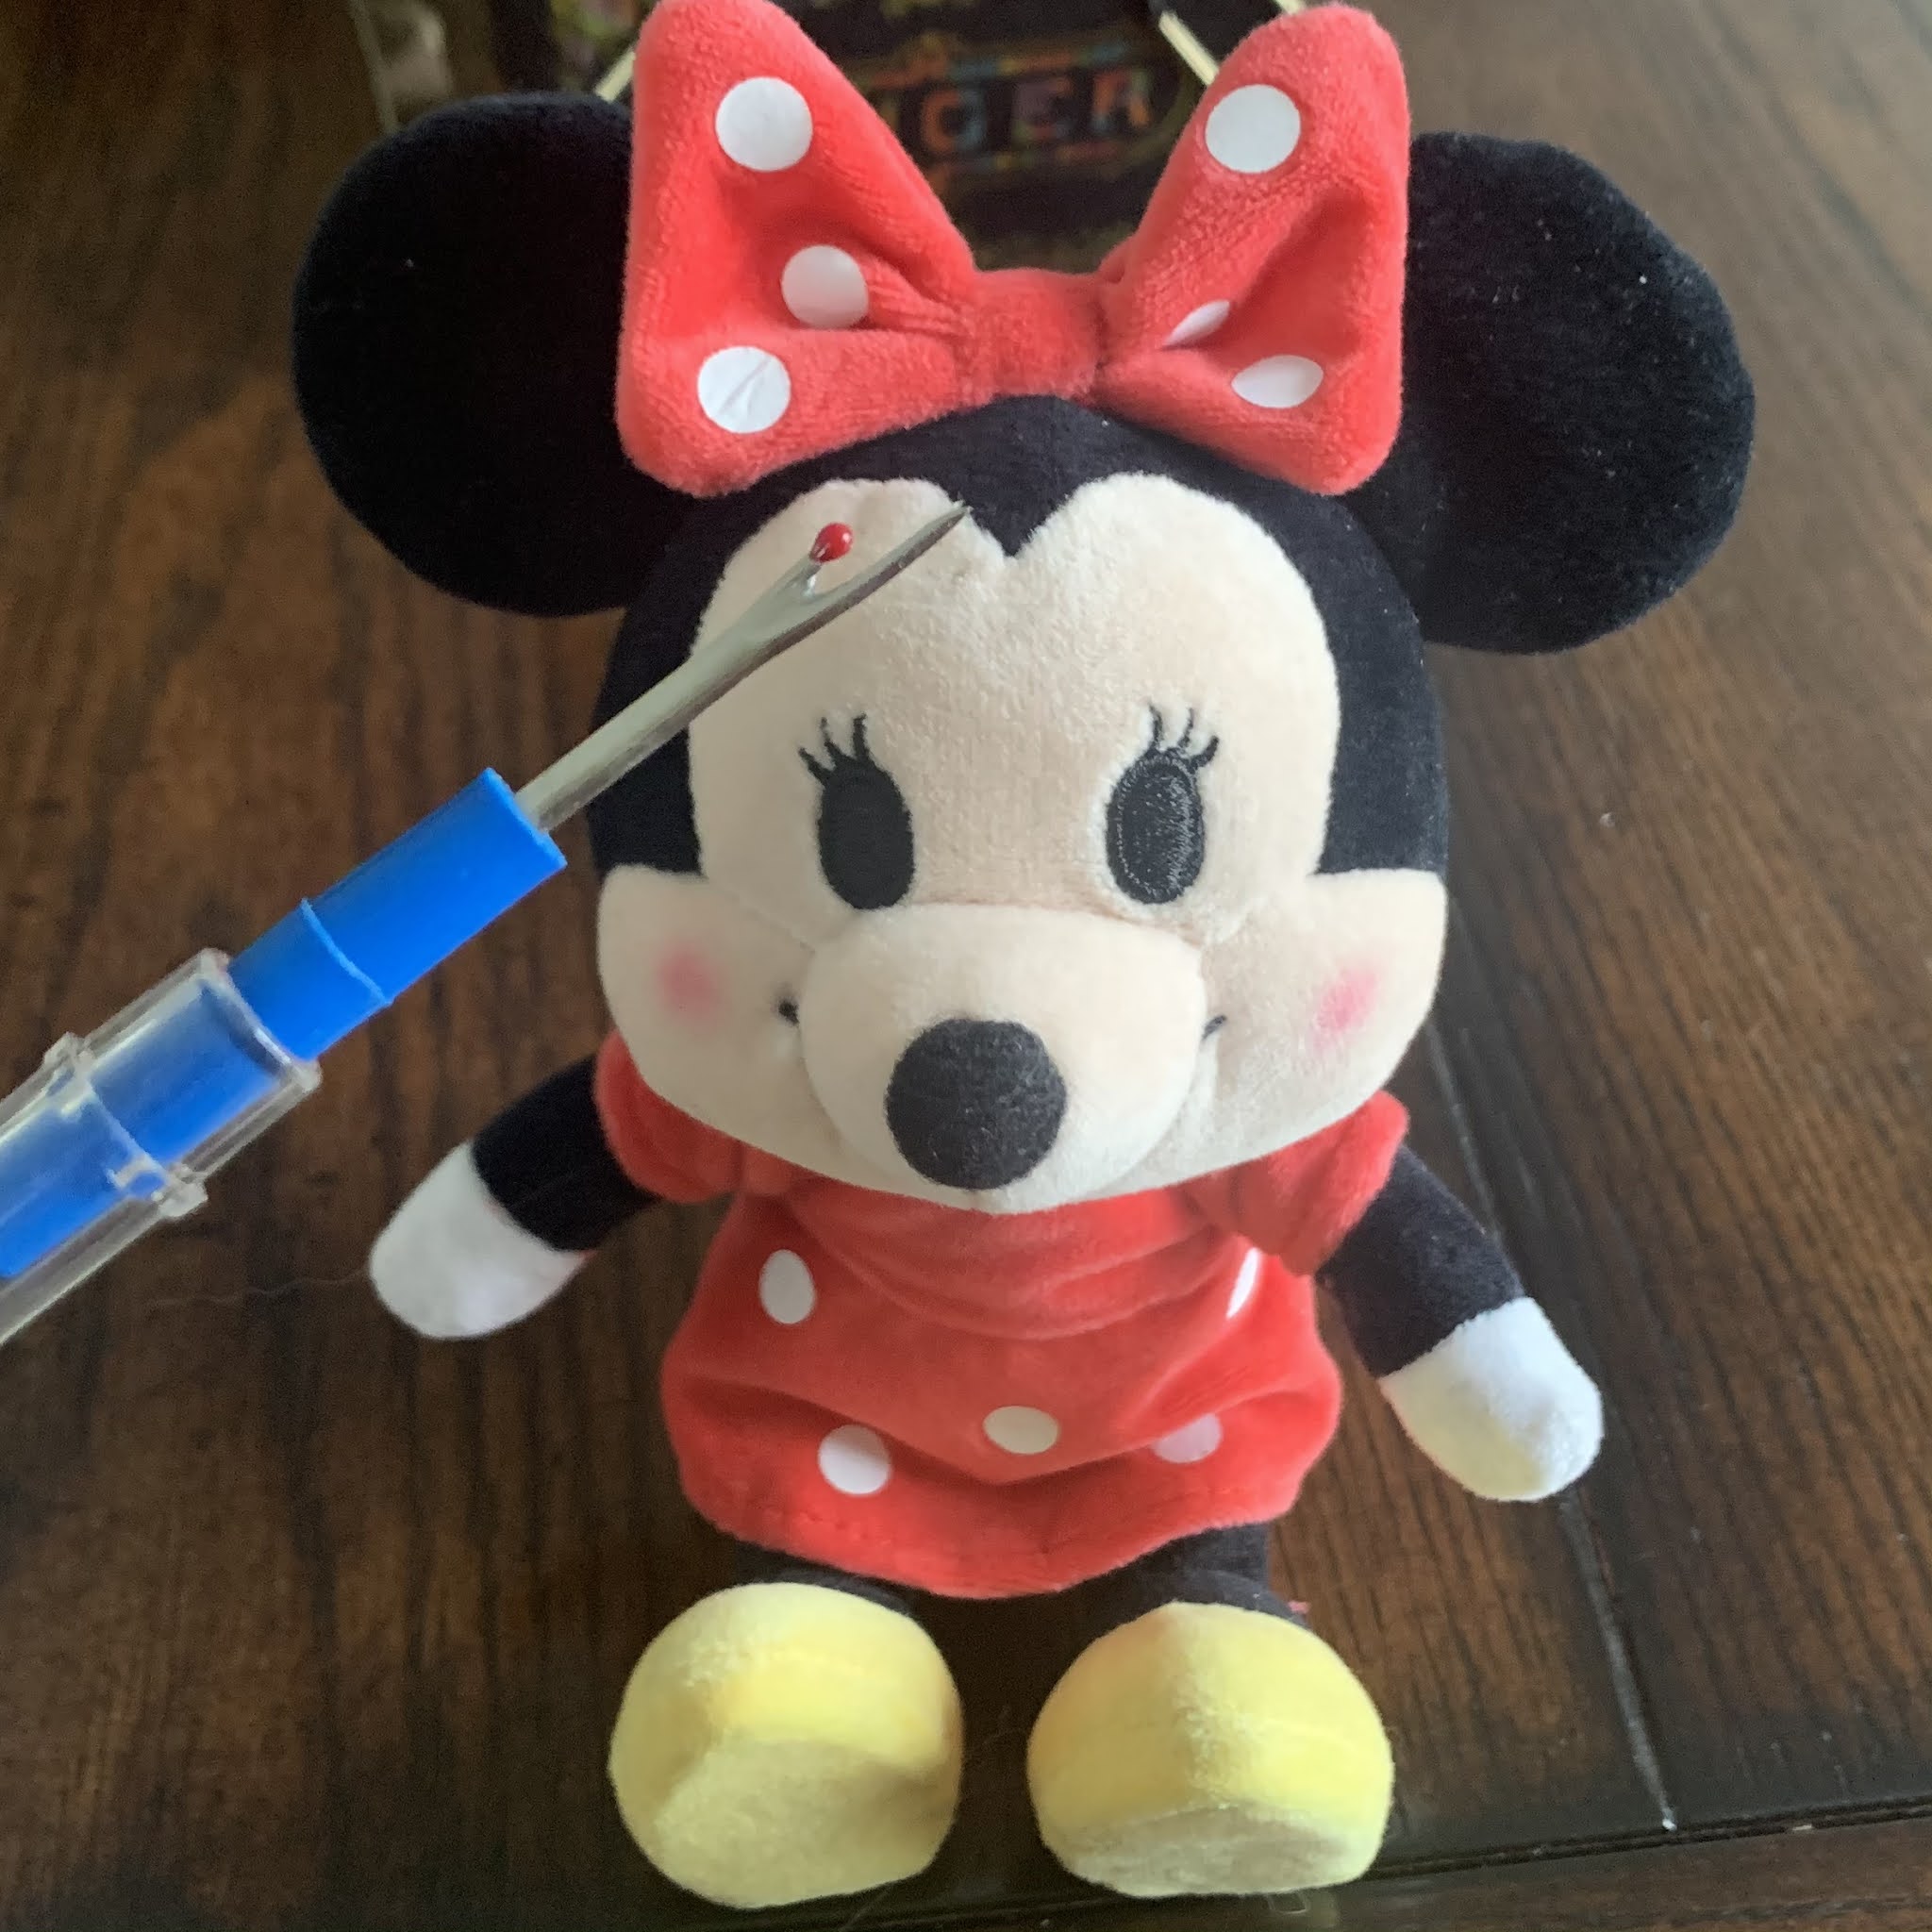
Remove the bow using a seam ripper, or carefully with scissors. Both Minnie and Daisy’s bows are only sewn to the head and not INTO the head. This makes the process much simpler and less scary.
Step 2: Put a small dab of glue on one magnet and add it to the dent that was created by the bow. I suggest using the seam ripper to hold the magnet while placing glue on. The dent is very convenient, because it keeps the magnets and fabric low profile, making them less visible! Wait for the glue to cure enough that the magnet does not move around.

Step 3: Cut out a small circle of the fabric just slightly bigger than the magnet. Stitch this on top of the magnet, going around. I suggest a whip stitch. You can hide the end of the thread by running it through the entire head a few times. As you can see from the photo, it is nearly invisible on Minnie!

Step 4: Take the other magnet and place it over the first magnet. This will help you figure out which side needs to face the first magnet and which side needs to be glued. Take the magnet off, taking special care to remember which side is to be glued. Glue it to the bow. You can hide magnets inside bows and such, but it reduces their strength. I find the magnets are very well hidden when on the nuiMOs, so I don’t bother hiding them further.
Step 5: Let the glue cure completely before trying to use the magnets, or you will likely have to start all over! E6000 has a shorter curing time, but I find Tacky Glue needs 6 hours or overnight to cure well enough. You are done! As you can see, the magnets are not visible!

Reversing the process:
Use a seam ripper to remove the threads you sewed on. The Tacky Glue can be removed with water! :)
If you try this tutorial out, let me know what you think! I am available to answer any questions you may have or help troubleshoot via my nuiMOs Instagram or within the Facebook group (both below).
Instagram: @kawaii.nuimos
Facebook Group: Disney nuiMOs Crafters
Comments
Post a Comment